
1. Delete encounter 2. Printing documents 3. Add package
1. Delete encounter
In order to be able to delete an encounter, there must be no charges applied to the account.
It's important to let you know that once the account has been deleted you won't be able to recover it.
1. Once the encounter has been created, click on the icon Delete the record.
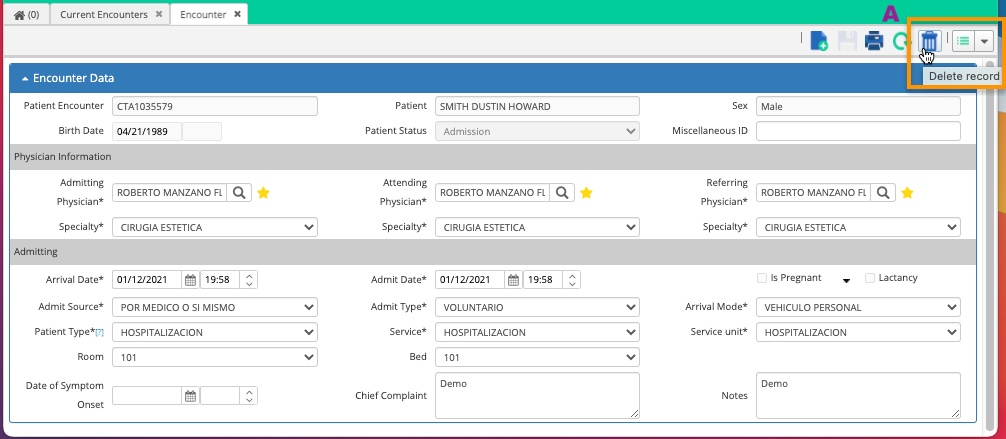
Delete encounter.
After finishing the steps listed above
You'll have deleted the patient encounter.
Congratulations!
2. Printing documents
Once the encounter has been created:
1. Click on the icon Print.
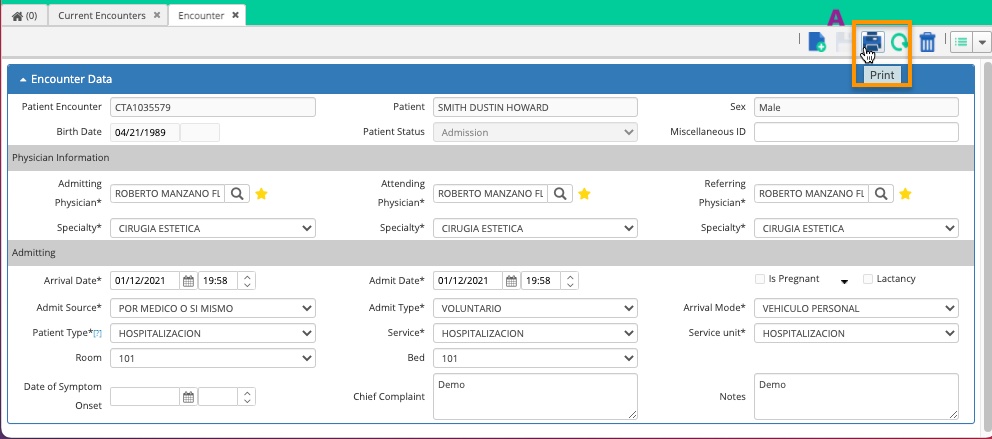
Printing documents.
To print tags follow the next steps:
1. The system will open up the Printing documents window, select the type document you wish to print: patient sheet, tags 2 ⅝ x 1 in (3 columns) o 4 x 1 in (2 columns), coding summary, prescriptions, etc.; click on *Print* (the system will display a preview of the document), click again on the printer icon of the preview window.

Printing the selected document.
After finishing the steps listed above
You'll have printed a document.
Congratulations!
3. Adding a package
Once the encounter has been created.
1. Click on the menu and select the option Packages.
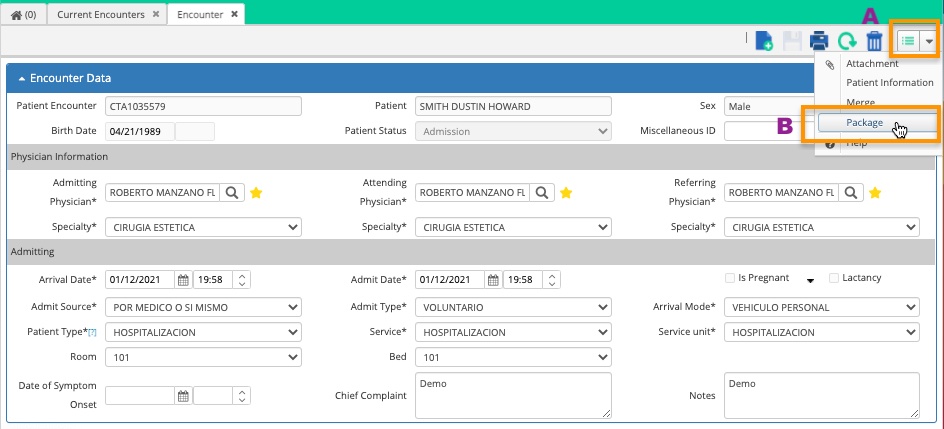
Select the option Packages.
1. The system will open up the Packages encounter window, select the package you wish to add, add the package, and click on Save.
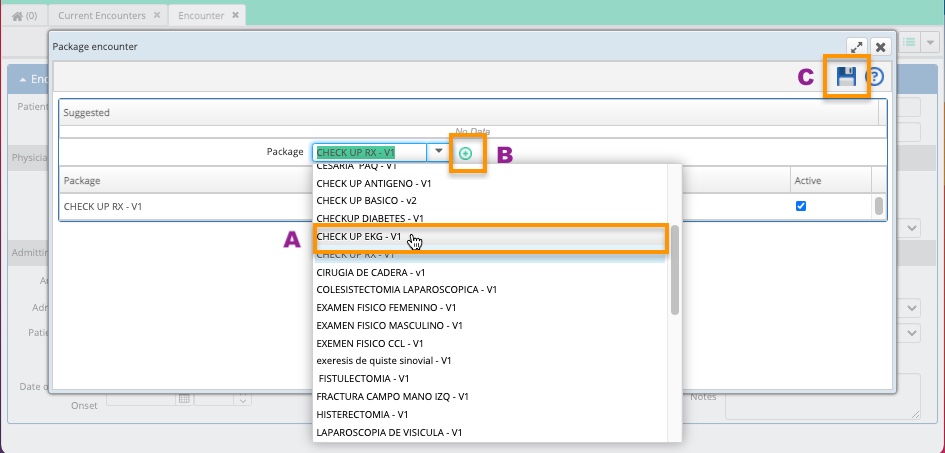
Selection of packages.
During the assignation process of the package, the access to the following windows will be denied until the process has been finalized: Encounter, Encounter packages, Billing Statement, Package report, Multibilling, and Encounter Charges.
After finishing the steps listed above
You'll have added a package to the encounter.
Congratulations!
Comments
0 comments
Article is closed for comments.